When accessing the stopwatch screen, we will see that the repetitive elements are listed at the top. If we have registered frequency or machine elements in our work method, they will not appear on this screen.
Assign the Observed Activity to Each Measurement
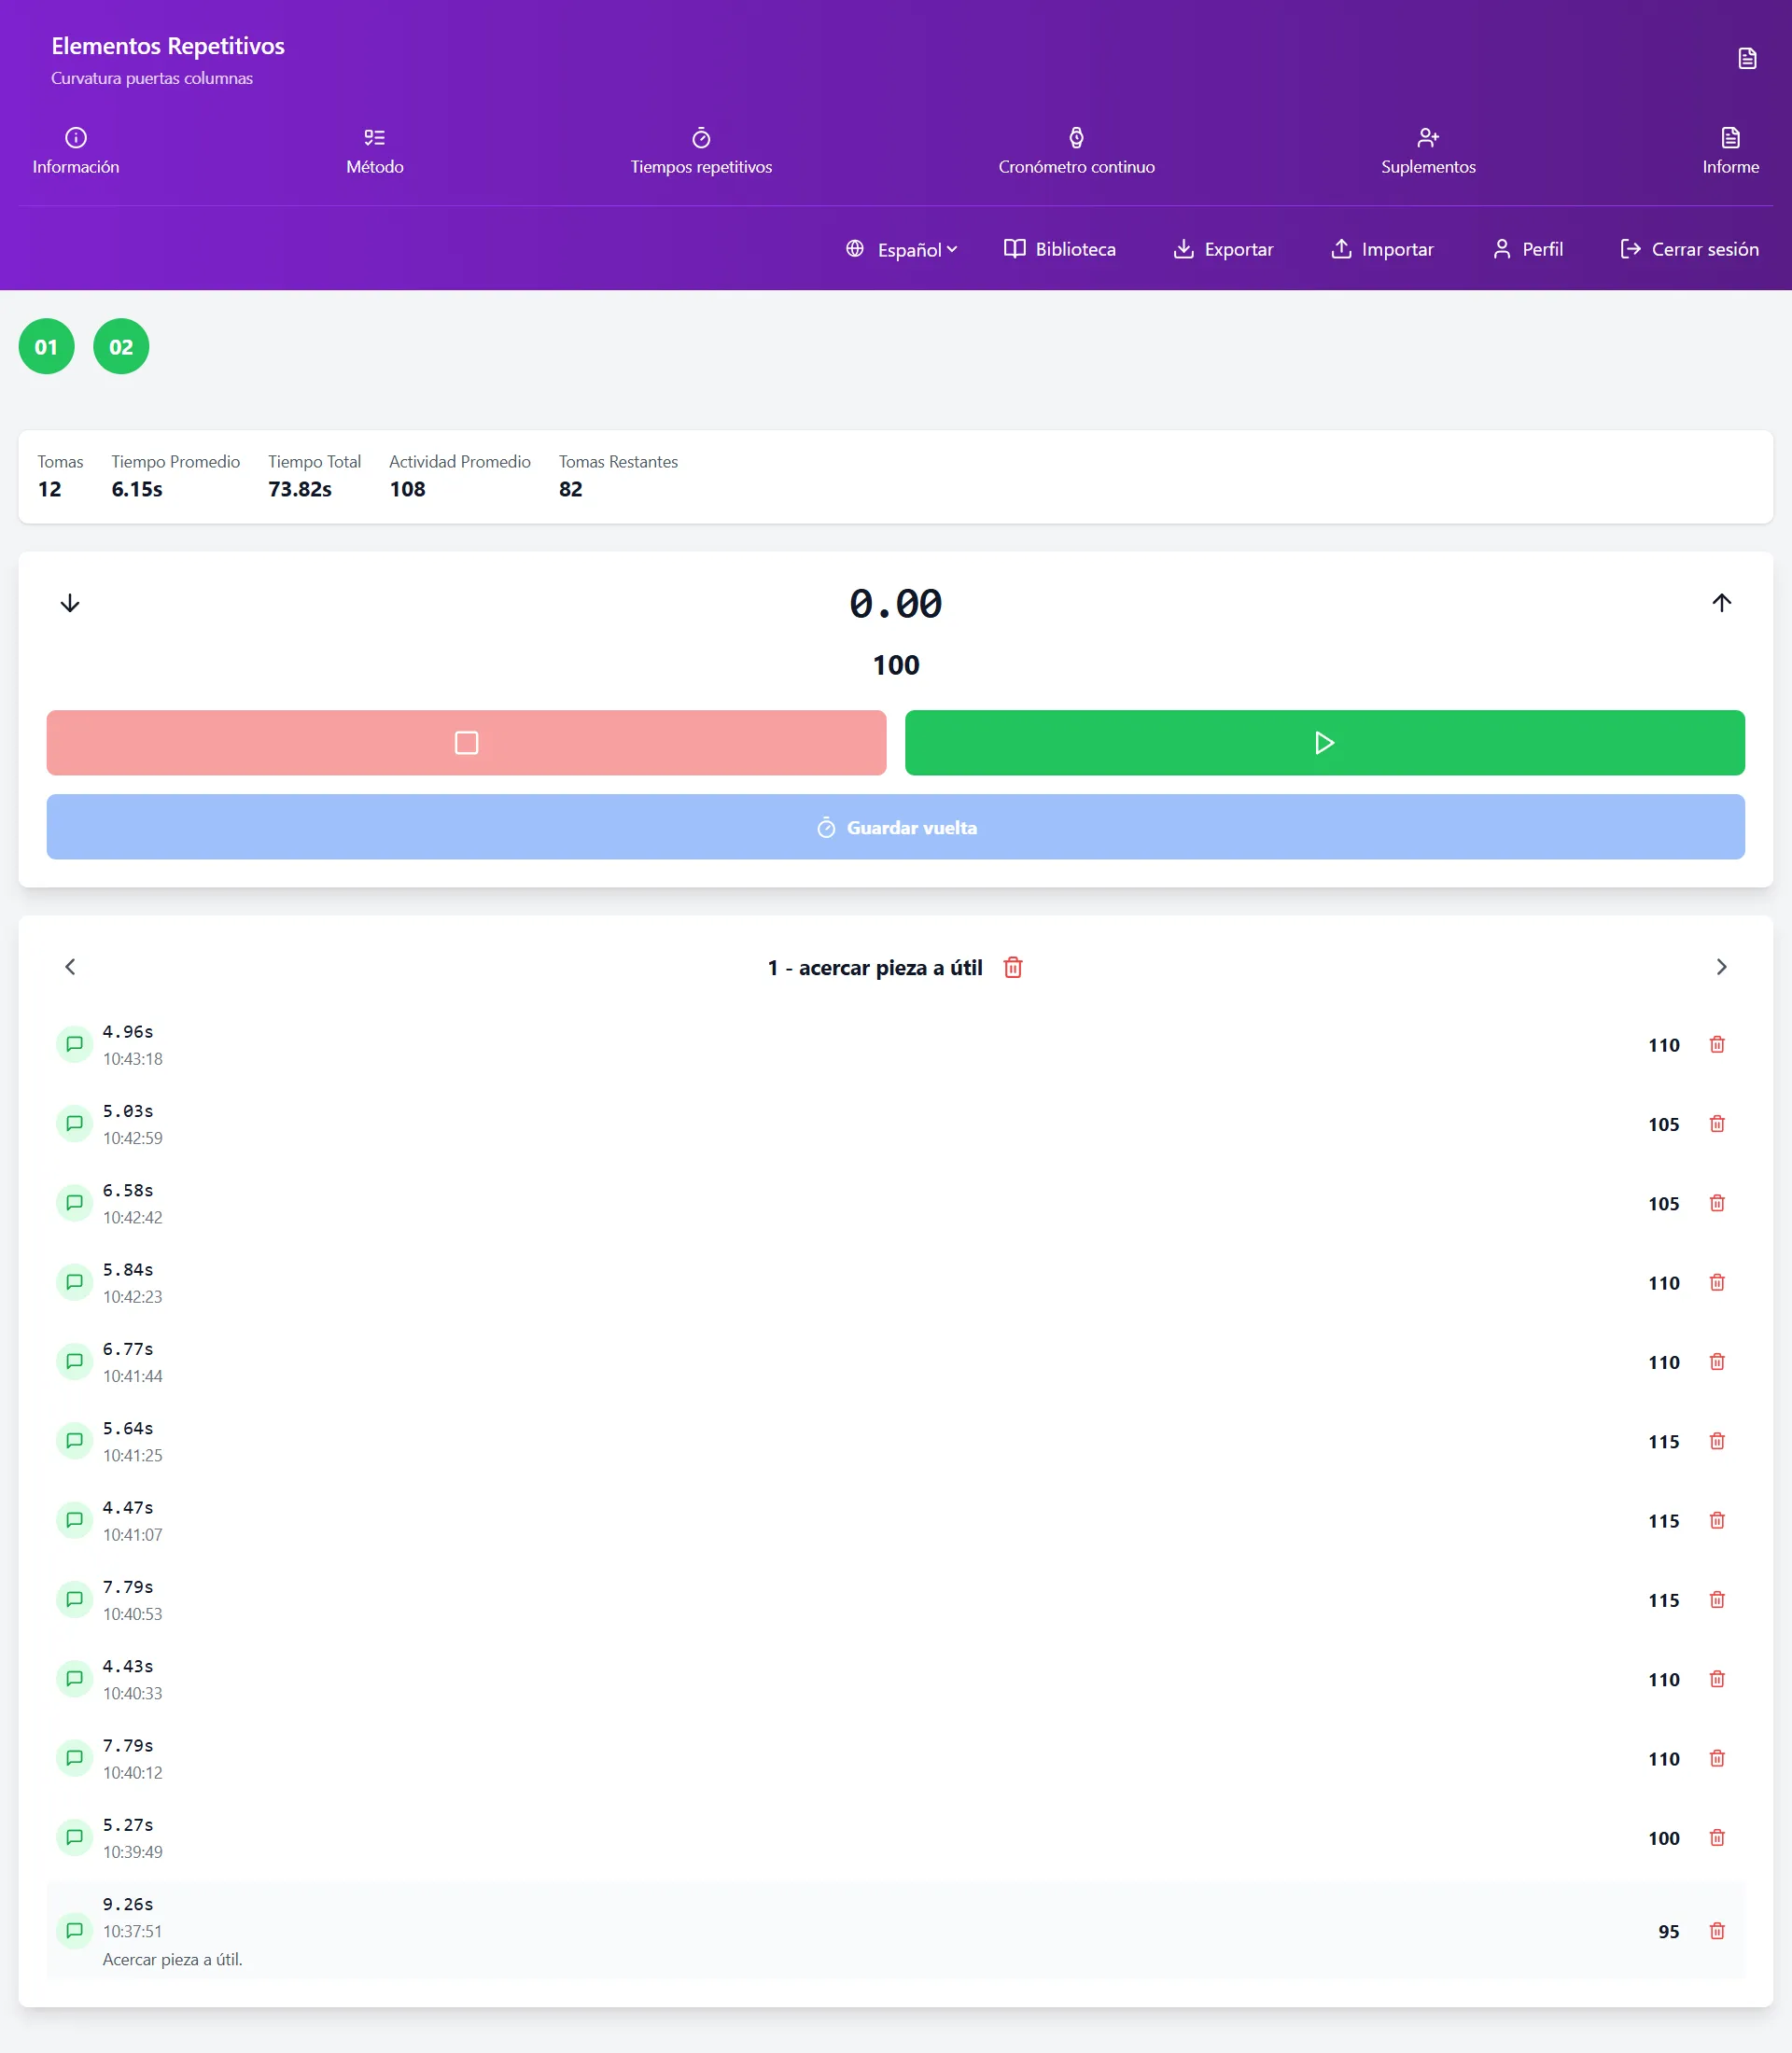
We can assign the rated pace in each measurement by modifying the activity using the plus and minus symbols located on the sides of the stopwatch.
We can also slide our finger on the stopwatch itself to the right to increase the activity or to the left to decrease it.
Record Times of Measurements
By clicking on the button where the activity is marked, the time will be recorded and registered in the list of the element we are currently measuring, automatically moving on to measure the next element in our cycle.
In case an incident occurs in any element, we can record a comment for that measurement by clicking on the microphone button located on the left for each of the measurements.
Information About the Element Being Measured
When recording the different times for each task, you can read the description of the element you are currently measuring at the bottom of your device.
Calculation of Remaining Measurements
When clicking on the stop button, the number of remaining measurements that need to be taken to have a 95% reliability in the study will appear, calculated according to the statistical method.
Where: n = Sample size we want to calculate (number of observations), n' = Number of observations from the preliminary study, Σ = Sum of values, x = Value of observations.
You can find more information in our article: Number of Observations Required in an Industrial Time Study.
It will also show us the average activity recorded in the different measurements.
Edit a Time
When clicking on a specific measurement, a window will appear where we can modify the observed time or the rated pace. To delete a measurement, we will make a long press on the measurement we wish to delete, and it will be removed.
Measure a Frequency Element in the Middle of a Cycle
If during the measurement of a repetitive element of the main work cycle, the worker we are measuring begins to perform a frequency element, we will press the "Start Frequency" button just below the stopwatch controls with an orange background. The button will change to a red color and its text will change to "End Frequency". When the work of this frequency element is finished, we will press again to record the time of that frequency element.
When recording the time of the frequency element, a window will appear for us to dictate the description of the frequency element performed by the operator. The application will continue measuring the task of the element we were timing, so we will only record the time when it moves to the next element.
The application will extract from the total time of that element the time that the worker has spent performing the frequency element and will generate, along with the description we have dictated by voice command, a new frequency element in our method screen. It will assign the recorded time and a default frequency of 50, which we should modify to the actual frequency of that frequency element.
Reorder the Work Method
Sometimes we define a method, and when we arrive at the workstation, the worker performs the cycle in a different order than we had anticipated. In this case, we can reorganize our method.
To do this, we simply have to click on each of the upper bubbles that identify the different tasks: 01, 02, 03.
When we click on one, it will acquire a white background, and we will observe how the list that belonged to that task has disappeared. Now we will click on the same bubbles in the order in which we want to reorder our work cycle.
Measure Only 1 or Several Repetitive Elements of Our Cycle
We can also take times only for one element or for those elements that we need by selecting only these and leaving those we do not want to measure blank.
In our example image, we are going to measure only elements two and one but in reverse order.
We could also measure just 1 element of the cycle by selecting only that one.
Clear All Lists Without Deleting Data from the Database
If we make a long press on the start stopwatch button, all elements to be measured will be deselected at once, without deleting the saved times. This is useful when we want to reorder the method and have quite a few repetitive elements.
Delete the Times of an Element
If we make a long press on the green circle that identifies each of the elements, 01, 02, 03, the option to delete all times saved in the database for that task will appear.
Delete an Individual Measurement
To delete an individual measurement, you just need to make a long click on it, and it will be directly deleted, saving the new list without the discarded measurement.
Expand the View of the Time List
If we want to have an expanded view of all our measurements, we will click on the round button in the header of the web with the icon of an "eye". This way, the list will be expanded for a better understanding of the data.
To return to the view where the stopwatch appears again, just press the same icon that is now red and has a stopwatch icon.
Conclusion
Mastering industrial time study techniques is essential for any professional seeking to optimize production processes. The systematic application of these methods not only improves operational efficiency but also significantly contributes to cost reduction and increased business competitiveness. Remember that precision in measurement and rigorous data analysis are the basis for establishing reliable time standards that drive continuous improvement in your organization.